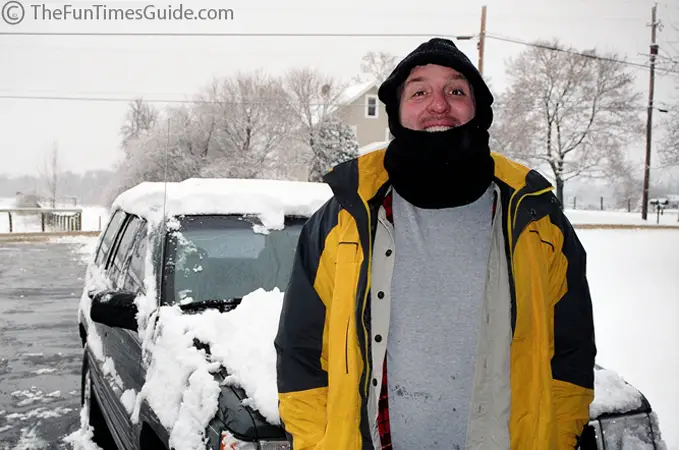
This is an excellent video on taking photographs in subzero weather (and timely here in Michigan)
Showing posts with label how to photograph in the winter. Show all posts
Showing posts with label how to photograph in the winter. Show all posts
Wednesday, January 29, 2014
Tuesday, January 28, 2014
More Tips on Taking GREAT Winter Photographs
10 Tips For Taking Great Winter Pictures When Your Subject Is Surrounded By Snow
Typically,
when you use your camera’s “auto” setting to take pictures outdoors in
wintry snow conditions, the pictures will come out too dark.
All that white snow messes with your camera’s internal “exposure” settings.
To avoid drab, gray winter pictures, and get the brightest, crispest photos with the brightest colors in snowy conditions, try these simple steps:

How To Take Great Winter Pictures
#1. If it snowed overnight, then take some shots very early in the morning, before the sun’s light becomes too bright. This way, the lights will be softer, the colors will be truer, and the snow will be fresher, and still untouched. Shots taken very early or late in the day will result in warmer photos with the snow taking on reddish hues. If you shoot midday, you’ll get much cooler, bluer photos.

#2. Most of today’s cameras (digital and film) have a way to change the “exposure compensation”. If you set the control to +1, it will overexpose the scene by one stop, admitting twice as much light into the photo.
#3. First focus your camera on a darker object, then press the shutter down halfway so it meters the dark object instead of the snow. Then, without lifting your finger, re-frame your photo to the shot you actually want, and depress the shutter button the rest of the way down to take the picture.
#4. You should do this any time you’re taking pictures, but its even more important with winter outdoor photography… Make sure the sun is on the right or left side of your subject during morning and evening hours and directly behind you when it’s high in the sky. You should never shoot into the direction of the sun.

#5. To photograph frost-covered branches, snow resting on a pinecone or mailbox, or the family pet with a face-full of snow… move in close to eliminate much of the background and use your camera’s “macro/close-up” mode.
#6. To photograph ice skaters, sledders, snowmobilers, snow shovelers, skiers, etc… all of whom are “on the go”, you’ll want to use your camera’s “action” setting
#7. If it’s sunny outside, turn on your camera’s “fill flash” and get as close to your subject as possible. (This lightens facial shadows by reducing the amount of white background in your picture, so your camera’s automatic metering will be more accurate.)


#8. Another fun technique for action shots is to “prefocus” (or lock the focus) on a spot in the path of someone in action. Then, just as your subject reaches that spot, depress the shutter the rest of the way down, effectively freezing them in action!

#9. To photograph a snowman, kneel down to get a low angle and shoot up toward the snowman. This will make the snowman seem tall and mighty.
#10.
While completely snow-covered scenes can be beautiful, try to compose a
few shots around something that’s noticeably colorful. Any object
placed in the foreground or middle of your shot that’s not white, gray
or black will add life to your photo.

Doesn't look like winter is going to leave us anytime soon!All that white snow messes with your camera’s internal “exposure” settings.
To avoid drab, gray winter pictures, and get the brightest, crispest photos with the brightest colors in snowy conditions, try these simple steps:

#1. If it snowed overnight, then take some shots very early in the morning, before the sun’s light becomes too bright. This way, the lights will be softer, the colors will be truer, and the snow will be fresher, and still untouched. Shots taken very early or late in the day will result in warmer photos with the snow taking on reddish hues. If you shoot midday, you’ll get much cooler, bluer photos.

#2. Most of today’s cameras (digital and film) have a way to change the “exposure compensation”. If you set the control to +1, it will overexpose the scene by one stop, admitting twice as much light into the photo.
#3. First focus your camera on a darker object, then press the shutter down halfway so it meters the dark object instead of the snow. Then, without lifting your finger, re-frame your photo to the shot you actually want, and depress the shutter button the rest of the way down to take the picture.
#4. You should do this any time you’re taking pictures, but its even more important with winter outdoor photography… Make sure the sun is on the right or left side of your subject during morning and evening hours and directly behind you when it’s high in the sky. You should never shoot into the direction of the sun.
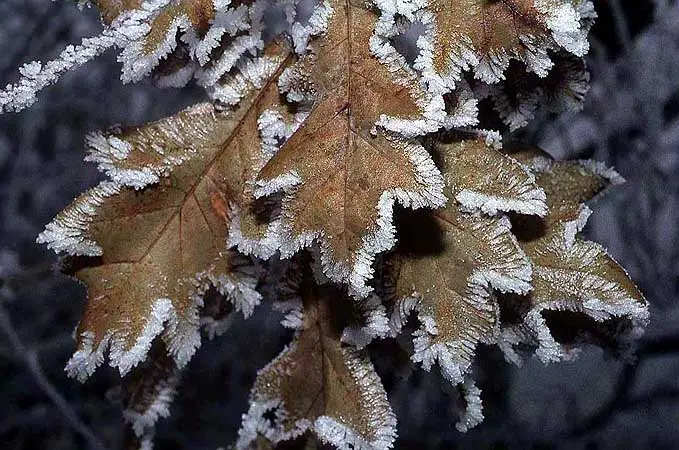
#5. To photograph frost-covered branches, snow resting on a pinecone or mailbox, or the family pet with a face-full of snow… move in close to eliminate much of the background and use your camera’s “macro/close-up” mode.
#6. To photograph ice skaters, sledders, snowmobilers, snow shovelers, skiers, etc… all of whom are “on the go”, you’ll want to use your camera’s “action” setting
#7. If it’s sunny outside, turn on your camera’s “fill flash” and get as close to your subject as possible. (This lightens facial shadows by reducing the amount of white background in your picture, so your camera’s automatic metering will be more accurate.)

#8. Another fun technique for action shots is to “prefocus” (or lock the focus) on a spot in the path of someone in action. Then, just as your subject reaches that spot, depress the shutter the rest of the way down, effectively freezing them in action!
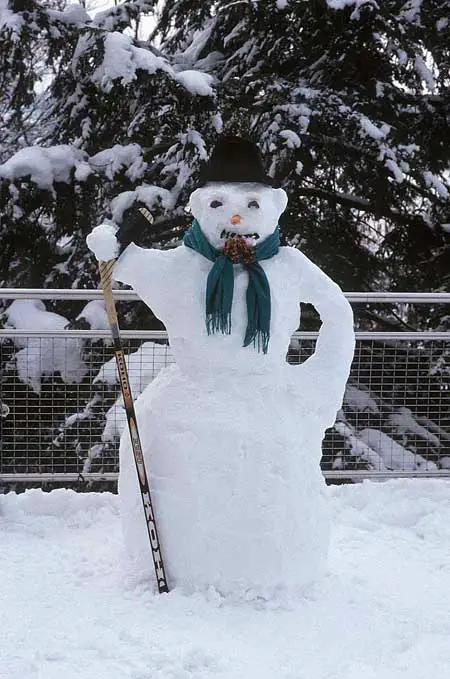
#9. To photograph a snowman, kneel down to get a low angle and shoot up toward the snowman. This will make the snowman seem tall and mighty.
Lynnette Walczak
I like to help people find unique ways to do things in order to save time & money -- so I frequently write about "outside the box" ideas that most wouldn't think of. As a lifelong dog owner, I often share my best tips for living with and training dogs. I worked in Higher Ed several years until switching gears to pursue things I was more passionate about. I've worked at a vet, in a photo lab, and at a zoo -- to name a few. I enjoy the outdoors via bicycle, motorcycle, Jeep, or RV. You can always find me at the corner of Good News & Fun Times as publisher of The Fun Times Guide (32 fun websites).Enjoy the beautiful, but frigid weather and capture beautiful photos!
Appleberry Photography
Visit our online store!
Appleberry Photography
Friday, January 17, 2014
Appleberry Photography-5 Tips For Taking Winter Photographs-Digital Photography
Here in Michigan we had another snowfall. Thankfully, this time it isn't the foot of snow that we experienced last week!
Here is excellent video on photographing in the snow!
5 Tips on Winter Photography
Winter photography can be a challenge, but if you prepare for the snow and compensate for the cold, often frigid temperatures, your photographs will be awesome!
Happy Photographing!
Appleberry Photography
To visit our online store:
Appleberry Photography
Subscribe to:
Posts (Atom)